
PowerApps is often associated with forms, automations, and data… but it can also be a window into the physical world. Literally.
Imagine you’re building an app for field technicians, delivery staff, or inspection teams. What if you could record where the data is being submitted from? What if you could verify that users are actually at the right location? Or even generate real-time maps of the visits being made?
In this post, I’ll cover:
- What geolocation is and how it works in PowerApps
- A real-world example: registering visits with location data
What is the Location function in PowerApps?
PowerApps gives us access to the user’s position through the Location object, which includes:
Location.Latitude
Location.Longitude
Location.Altitude
This object updates automatically while the app is open (as long as the user has granted permission to access their location). It’s a quick and simple way to retrieve geolocation without using premium connectors or external integrations.
Real-World Example: Logging a Visit with Location Data
Let’s look at a typical case:
You work with a sales or field operations team that performs in-person visits to clients, job sites, or checkpoints. The requirement, at first glance, seems simple:
“We need to log the visit at the time and place it happens.”
In other words, no filling out the form from home at the end of the day. No “I’ll log it later when I have a minute.” Location matters, and real-time context makes all the difference.
How do we solve it?
Step 1: Create a “Visits” table
You can use Dataverse, SharePoint, or any data source where you have write access. The minimum structure would be:
| Field | Data Type |
|---|---|
| Owner | User |
| DateTime | Date and Time |
| Latitude | Decimal |
| Longitude | Decimal |
Both latitude and longitude should be stored in decimal format—the more decimal places, the better the accuracy.
Step 2: Add the logic in PowerApps
Open PowerApps Studio, and add the table you just created as a data source:

Then, add a button to register the visit, and use the following formula:

Patch(
    'Sales visits',
    Defaults('Sales visits'),
    {
        Name: "test",
        Latitude: Location.Latitude,
        Longitude: Location.Longitude
    }
)
This will create a new record with the user’s name, the exact timestamp, and their current location when the button is pressed:

Geofencing (Zone Validation)
Now imagine you want to build an app where each specific location includes a tolerance range to verify whether the user is close enough to the expected point. Based on that, we could disable the check-in button if the user is not near the designated area.
So… how can we do this in PowerApps?
Before we dive in, we need to understand the Haversine formula. This formula is used to calculate the distance between two points on Earth when you know their latitude and longitude. It looks something like this:

I know, you’re not really sure what it means either, right? Don’t worry, neither am I. But luckily, we’ve got our good friend ChatGPT to translate all of this into PowerPlatformese:
// Reference coordinates (e.g., client location)
Set(varLatReference, 28.123456);
Set(varLonReference, -15.654321);

// Haversine formula to calculate distance in meters
Set(
    varDistance,
    6371000 *
    Acos(
        Cos(Radians(varLatReference)) *
        Cos(Radians(Location.Latitude)) *
        Cos(Radians(Location.Longitude - varLonReference)) +
        Sin(Radians(varLatReference)) *
        Sin(Radians(Location.Latitude))
    )
)
You can add this logic wherever it makes the most sense for your app—whether in the OnVisible property of the screen, right before submitting the form, or even in the DisplayMode property of your submit button. In my case, I’ll go with the latter.
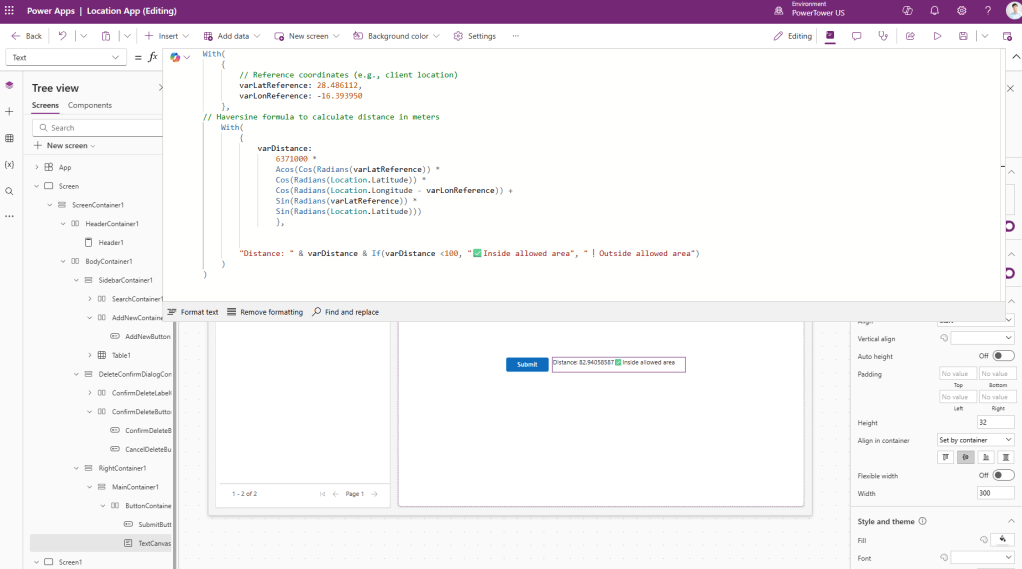
First, let’s add a text label to display the current distance from the user’s location to the defined reference point:
With(
    {
        // Reference coordinates (e.g., client location)
        varLatReference: 28.486112,
        varLonReference: -16.393950
    },
// Haversine formula to calculate distance in meters
    With(
        {
            varDistance:
                6371000 *
                Acos(Cos(Radians(varLatReference)) *
                Cos(Radians(Location.Latitude)) *
                Cos(Radians(Location.Longitude - varLonReference)) +
                Sin(Radians(varLatReference)) *
                Sin(Radians(Location.Latitude)))
                },


        "Distance: " & varDistance & If(varDistance <100, "✅Inside allowed area", "❗Outside allowed area")
    )
)
As you can see, I’m currently about 83 meters away from the reference point we specified in the formula (Latitude = 28.486112, Longitude = -16.393950):
Now all that’s left is to apply this logic to the DisplayMode property of the button:
With(
{
// Reference coordinates (e.g., client location)
varLatReference: 28.486112,
varLonReference: -16.393950
},
// Haversine formula to calculate distance in meters
With(
{
varDistance:
6371000 *
Acos(Cos(Radians(varLatReference)) *
Cos(Radians(Location.Latitude)) *
Cos(Radians(Location.Longitude - varLonReference)) +
Sin(Radians(varLatReference)) *
Sin(Radians(Location.Latitude)))
},
If(varDistance <100, DisplayMode.Edit, DisplayMode.Disabled)
)
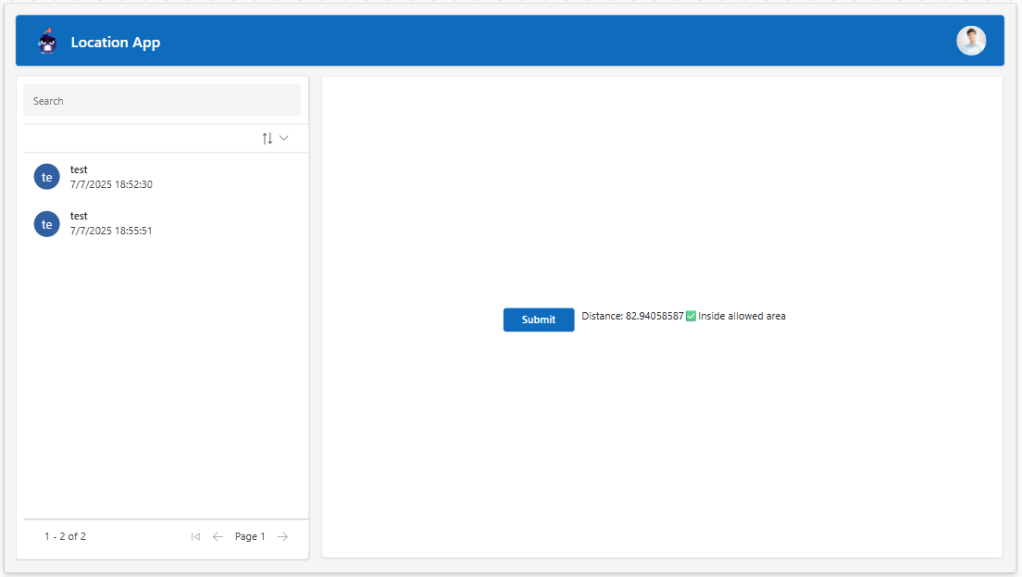
)Below are two examples showing how the app would look depending on whether you’re inside or outside the specified area:
✅ Inside the area:
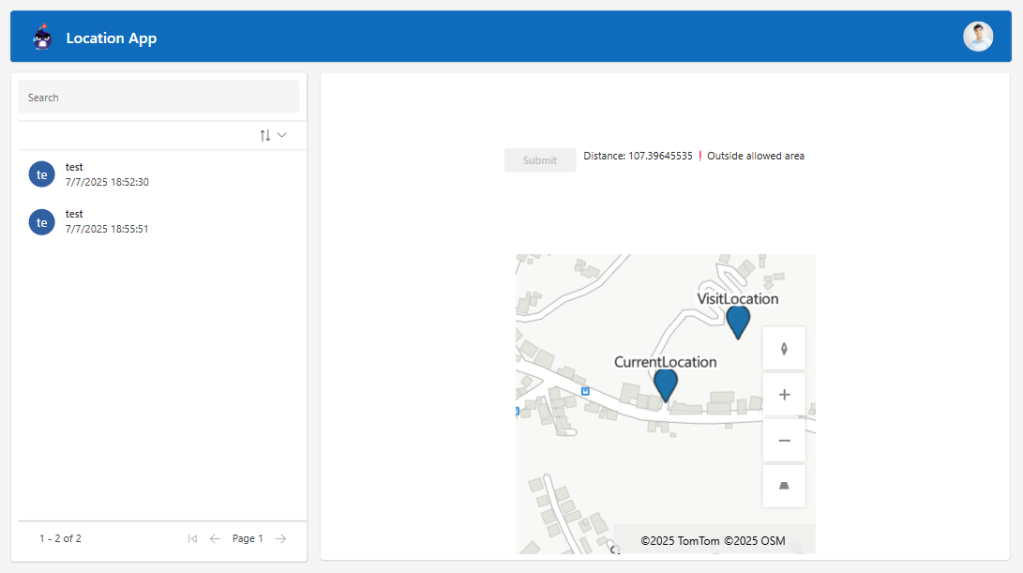
❗Outside the area:

Add a map to display locations
PowerApps can insert maps to visualize locations. To do this, search for “map” in the Insert section.

This control has some interesting properties for displaying locations:
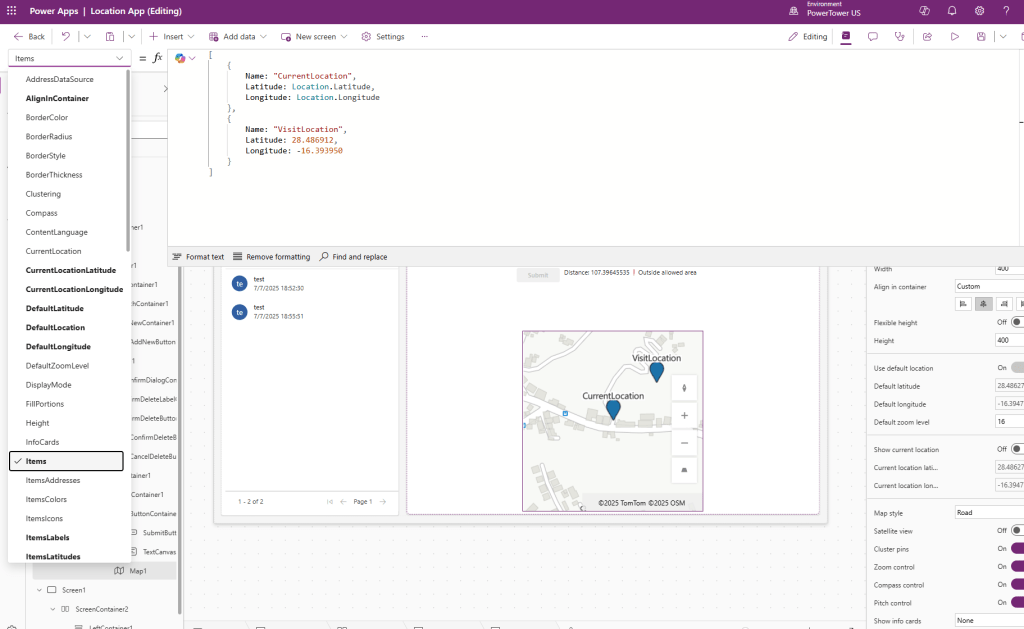
Property: Items
We will set an array with the current location and the location of the sales visit, as follows:
[
{
Name: "CurrentLocation",
Latitude: Location.Latitude,
Longitude: Location.Longitude
},
{
Name: "VisitLocation",
Latitude: 28.486912,
Longitude: -16.393950
}
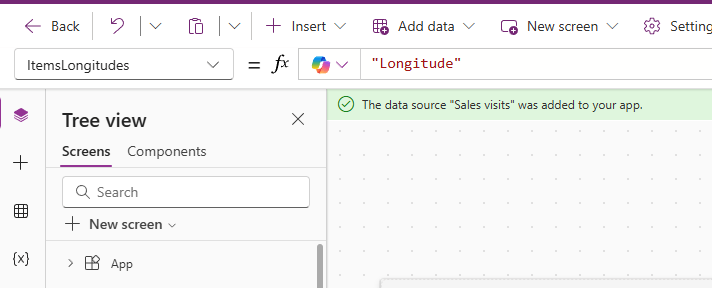
]Property: ItemsLabels
We will set it as follows:

Property: ItemsLatitudes and ItemsLongitude

As a result, we will obtain a map where we can view both locations on the map:
In conclusion…
Geolocation in PowerApps isn’t magic… but it’s close.
With just a couple of formulas, you can build smarter apps that are connected to the physical world and solve real needs, such as verifying visits, recording locations, or generating automatic contexts.
And as always, it’s not about making apps more complicated, but more useful. Sometimes, just knowing where you are is enough to make better decisions.


Leave a comment